Follow Me On Social Media!


Oreo Pie: The Indulgent Dessert You’ll Crave Again and Again
Introduction to Oreo Pie
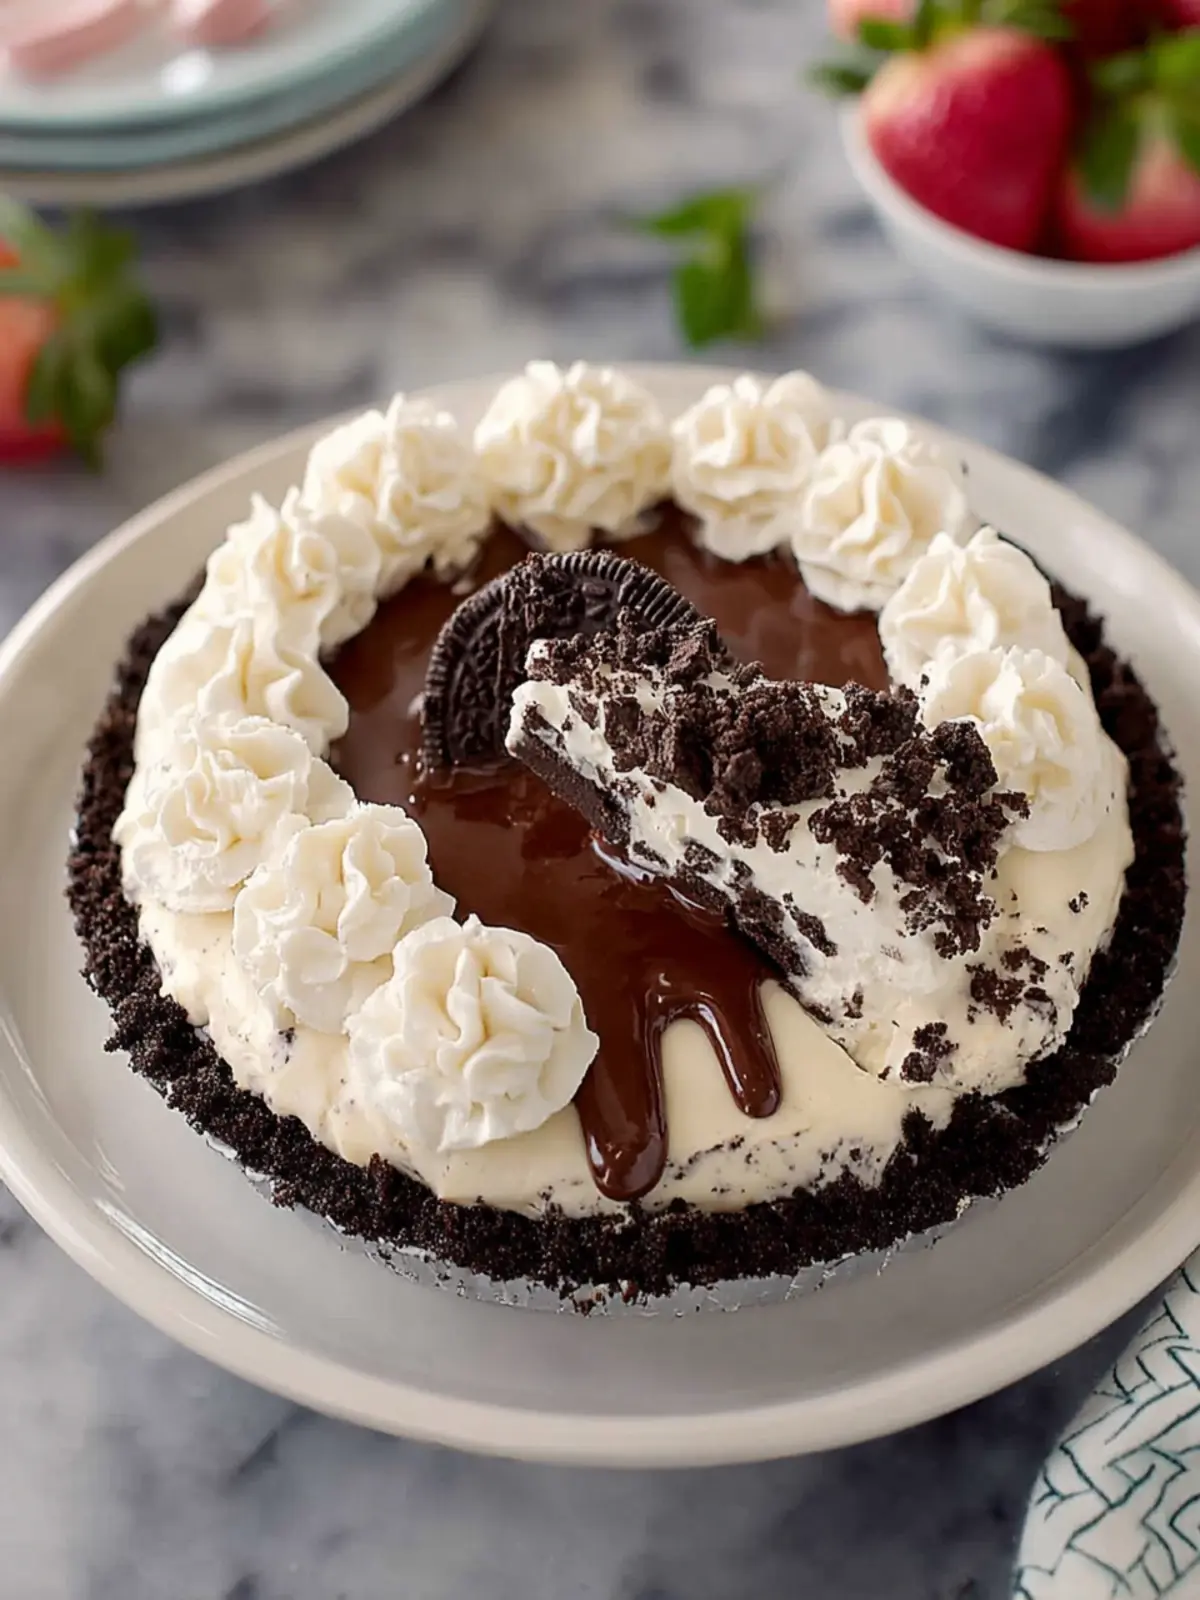
Oreo Pie captivates dessert lovers with its delightful balance of creaminess and crunch, a seemingly magical combination that stirs up nostalgia with every bite. Imagine a warm, welcoming gathering where friends and family gather around a table, sharing laughter and indulging in this rich, delicious treat. The first slice is always the best—smooth chocolate and creamy filling layered between a crispy cookie crust, creating an experience that transcends age and occasion.
What makes Oreo Pie a beloved dessert? Its simplicity is definitely part of the charm. With just a handful of ingredients, you can whip up a stunning dessert that’s ideal for birthdays, holidays, or just a cozy night in. And who doesn’t love Oreos? The iconic black-and-white cookie is a classic favorite that brings back memories of childhood snack breaks—the kind of treat that makes you feel instantly at home.
This dessert isn’t just about taste; it’s also about presentation. The contrasting layers of dark crust and creamy white filling provide an appealing aesthetic that will wow your guests when you serve it. Plus, it’s versatile. Whether you opt for a classic Oreo crust or experiment with variations like adding peanut butter or mint flavor, there’s always room for personalization.
Creating an Oreo Pie also turns you into a master of time management in the kitchen. The best part is that it doesn’t require hours of slaving over an oven. Instead, it gives you more opportunities to connect with loved ones while it sets in the fridge.
As you gather the ingredients and begin the process, you’ll notice that each step is straightforward, allowing even novice bakers to create something extraordinary. In no time, you’ll have a tempting pie that not only satisfies cravings but also warms the heart, making it the perfect addition to any social gathering or cozy night in.
Ready to dive into the delicious world of Oreo Pie? Let’s get started!

Key Ingredients for Oreo Pie
Creating the perfect Oreo pie is all about selecting the right ingredients that come together to form a delicious, creamy masterpiece. Here’s a breakdown of what you need for this decadent dessert.
-
Oreo Cookies: Naturally, the star of our Oreo pie is the beloved Oreo cookies. I recommend using classic Oreos for that authentic flavor. Their crunchy chocolate wafers provide the perfect texture and rich taste that complement the filling beautifully.
-
Butter: Unsalted butter is used to create the crust. It binds the crushed Oreos together, resulting in a rich, crumbly base. Make sure to melt the butter thoroughly to ensure everything sticks together nicely.
-
Cream Cheese: For a smooth and creamy filling, I opt for softened cream cheese. It’s essential to let it warm to room temperature to avoid lumps and achieve a perfectly silky texture.
-
Sugar: To balance the flavors, granulated sugar is mixed into the cream cheese. This adds just the right amount of sweetness to offset the rich chocolate and creamy filling.
-
Cool Whip: For that light and airy texture, I use Cool Whip. It’s a key ingredient that brings a delightful fluffiness to the filling, making each bite melt in your mouth.
-
Milk: A splash of milk helps bring the filling together, creating a smooth consistency that’s easy to spread. Whole milk works well, but any milk you have on hand will do.
These key ingredients are what make your Oreo pie a showstopper at any occasion. With the right balance of flavors, you’ll have a dessert that everyone will be raving about!
Why You’ll Love This Oreo Pie
The ultimate cookie dessert experience
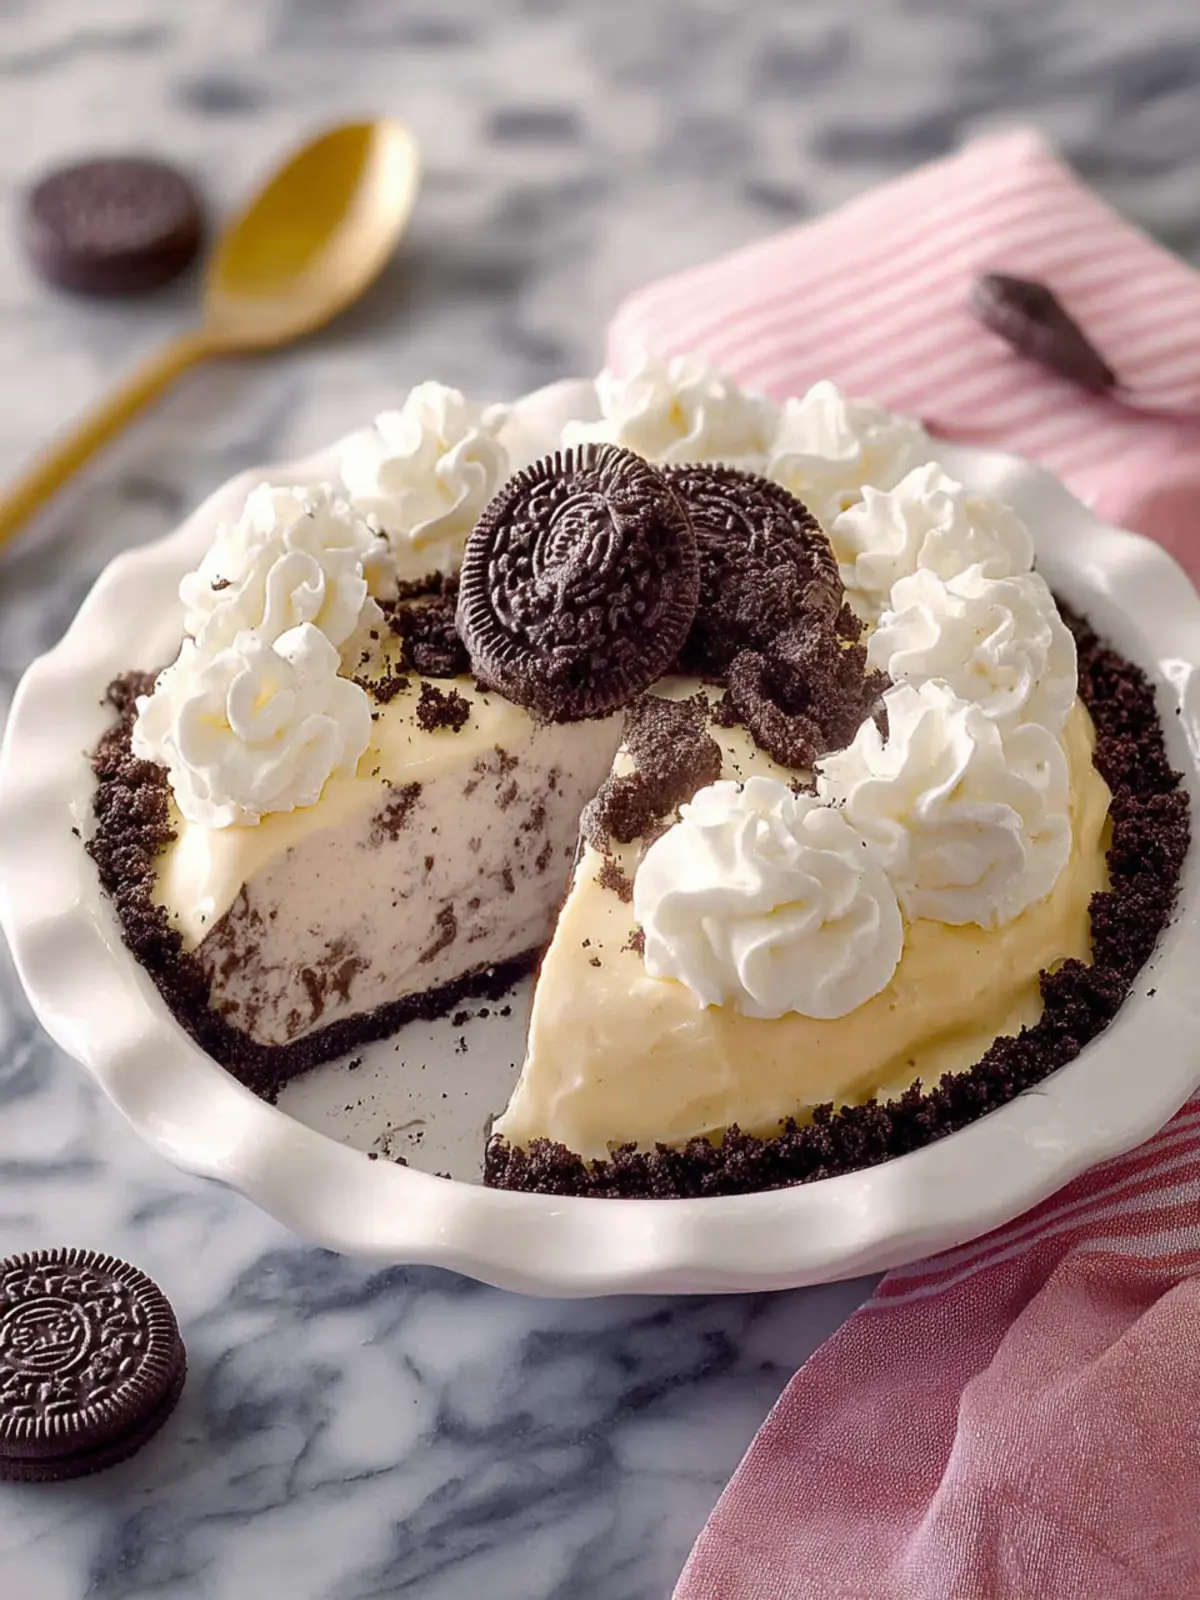
Imagine biting into a slice of Oreo pie, where the rich chocolate cookie crust meets a luscious cream filling, all topped with delightful whipped cream. Whether it’s a casual weeknight treat or the centerpiece at a gathering, this Oreo pie offers a nostalgic flavor that many young adults cherish. The harmonious combination of creamy, crunchy, and sweet creates a dessert experience like no other.
This pie is extraordinarily easy to whip up, making it a perfect choice for those who may feel intimidated by baking. The key to its charm lies in its simplicity. Just a handful of ingredients come together to craft a dessert that not only looks impressive but tastes divine.
- It brings a playful twist to traditional pies, appealing to cookie enthusiasts and casual dessert lovers alike.
- Each bite offers a textural adventure: the crispiness of the crust, the creaminess of the filling, and the smoothness of the topping all work in tandem to create joy.
The best part? This Oreo pie is incredibly versatile. You can elevate it with toppings like fresh berries, chocolate drizzle, or even a sprinkle of nuts for a touch of crunch. It’s a sweet escape that makes every bite a celebration, and once you try it, you’ll understand why it’s a beloved classic.
Tips for Making the Perfect Oreo Pie
Creating an Oreo Pie that dazzles both the eyes and taste buds is an art in itself. Here are some insider tips to help you nail that perfect texture and flavor balance, ensuring your pie stands out at any gathering.
Secrets to Achieve the Ideal Texture
-
Use Fresh Ingredients: The quality of your ingredients directly affects your pie’s texture. Always opt for fresh cream cheese and whipped topping to keep the filling rich and fluffy.
-
Chill the Filling: After mixing your Oreo Pie filling, allow it to chill in the refrigerator for at least two hours before serving. This helps it set properly, achieving that perfect creamy yet firm consistency.
-
Whip it Right: When whipping your cream or whipped topping, do not over-whip. Aim for soft peaks to keep the filling light and airy. Over-whipping can cause the cream to become too stiff, affecting the overall texture.
-
Layer it Well: When layering the pie, consider crumbling some Oreo cookies into the base for added crunch. This contrast elevates the texture and makes every bite interesting.
-
Don’t Forget the Garnish: Top your pie with crushed Oreos or chocolate shavings for aesthetics and an additional crunch factor. A garnish not only adds visual appeal but also enhances the overall tasting experience.
With these handy tips, you’re on your way to creating an unforgettable Oreo Pie that will have everyone coming back for seconds!
Time Details for Oreo Pie
Creating a luscious Oreo pie isn’t just about the ingredients; it’s also about timing. Imagine the anticipation as you await the moment your sweet treat is ready to enjoy!
Preparation time
The Oreo pie requires about 15 minutes of prep. You’ll be amazed at how quickly you can whip this up; it’s almost like magic!
Freezing time
After mixing your ingredients, let the pie chill in the freezer for a minimum of 4 hours. This step is crucial for achieving that perfect creamy texture.
Total time
In total, you’ll need approximately 4 hours and 15 minutes to complete your Oreo pie, so plan accordingly. The result is a stunning dessert that’ll impress friends and family alike!
Nutritional Information for Oreo Pie
Oreo pie is a delightful dessert that brings nostalgia to every bite with its rich flavors and creamy texture. Knowing the nutritional information can help you enjoy it guilt-free. Let’s break down the essentials:
Calories
Each slice of Oreo pie contains approximately 300 calories, making it a rich treat that’s perfect for special occasions or satisfying a sweet craving.
Fat Content
With around 20 grams of fat per slice, this pie gets its creaminess from the whipped cream cheese and Oreo crust. While it’s indulgent, a little goes a long way!
Sugar Content
Expect about 25 grams of sugar in one slice of this delicious Oreo pie. The sweetness comes from the Oreo cookies and added sugars, creating that irresistible flavor that everyone loves.
Enjoy this pie in moderation, and share it with friends to make the experience even sweeter!
FAQs about Oreo Pie
Creating a heavenly Oreo Pie is an experience filled with decadence, but you might have a few questions along the way. Let’s dive into some common concerns to ensure your pie comes out perfect every time.
How can I make my Oreo Pie firmer?
If you’re aiming for a firmer Oreo Pie, consider these tips:
- Chilling Time: Allow the pie to chill in the refrigerator for at least 4-6 hours, or overnight if possible. This extended time enables the filling to set nicely, yielding a denser texture.
- Cream Cheese Ratio: Using slightly more cream cheese can also help create a sturdier filling. Just be careful not to overdo it so the flavors remain balanced.
- Gelatin Option: For an ultra-firm texture, consider adding a tablespoon of unflavored gelatin to the cream cheese mixture. Just dissolve it in warm water first and mix it thoroughly into your filling.
Can I use light cream cheese in this recipe?
Absolutely! Using light cream cheese in your Oreo Pie is a great way to reduce some calories while still achieving a creamy texture. Just keep in mind that the flavor may be a tad less rich, but it should still be delicious. If you’re concerned about texture, you might want to pair it with a little whipped topping to maintain that creamy mouthfeel.
What’s the best way to store leftovers?
If you’ve got leftovers from your Oreo Pie, storing them correctly is key.
- Cover it Up: Wrap the pie tightly in plastic wrap or transfer it to an airtight container. This helps prevent moisture loss and keeps the flavors intact.
- Refrigeration: Store it in the refrigerator, where it should stay fresh for about 3-5 days. Just be sure to let it sit at room temperature for a few minutes before serving, as it will be easier to slice.
With these tips in hand, you’re ready to enjoy a perfectly sliced piece of your delightful Oreo Pie!
Conclusion on Oreo Pie
Final thoughts on this creamy delight
As you prepare to indulge in the delightful experience of Oreo pie, remember that this dessert not only satisfies those cravings but also offers a fun opportunity to get creative in the kitchen. The rich, creamy filling, perfectly complemented by the crunchy Oreo crust, makes each bite a genuine treat. It’s a fantastic option for gatherings or a simple night in, and the recipe is wonderfully adaptable. So, whether you’re serving it at a party or enjoying it solo, this Oreo pie is sure to leave a lasting impression on your taste buds. Happy baking!
Print
Oreo Cream Cheese Pie
- Total Time: 6 hours 30 minutes
- Yield: 8 servings 1x
- Diet: Vegetarian
Description
A delicious and easy no-bake Oreo cream cheese pie with a rich filling and Oreo crust.
Ingredients
Scale
- 24 Oreos (crushed, plus more for garnish)
- ¼ cup unsalted butter (melted)
- 1 cup heavy whipping cream
- 1 (8-ounce/226g) block cream cheese (room temperature)
- ¾ cup confectioners’ sugar
- 1½ teaspoons vanilla extract
- 20 Oreos (chopped, plus more for garnish)
- Whipped cream (for serving)
Instructions
- Lightly spray a 9-inch pie pan with cooking spray.
- In the bowl of a food processor, process the Oreos until finely ground, about 30-45 seconds. Place in a medium bowl, and stir in the melted butter until well combined. Press the mixture into the bottom and sides of the pie pan. Freeze while preparing filling, or at least 30 minutes and up to 3 days.
- In a large bowl using a handheld electric mixer, beat the cream on medium-high speed until stiff peaks form, about 2 minutes.
- In another large bowl, beat the cream cheese on medium-high speed until smooth and fluffy, about 2 minutes. (No need to clean beaters between the cream and cream cheese.) Add the confectioners’ sugar and vanilla, beating until smooth, about 1 minute.
- Gently fold in the whipped cream and chopped Oreos until combined. Spoon the filling into the frozen crust, spreading it into an even layer. Loosely cover and refrigerate until set, at least 6 hours or up to 2 days.
- When ready to serve, top with additional whipped cream and Oreos, if desired.
Notes
- This pie can be made ahead of time and stored in the refrigerator for up to 2 days.
- For a stronger Oreo flavor, feel free to add more chopped Oreos into the filling.
- Prep Time: 30 minutes
- Cook Time: 0 minutes
- Category: Dessert
- Method: No-Bake
- Cuisine: American
Nutrition
- Serving Size: 1 slice
- Calories: 320
- Sugar: 24g
- Sodium: 200mg
- Fat: 21g
- Saturated Fat: 10g
- Unsaturated Fat: 9g
- Trans Fat: 0g
- Carbohydrates: 32g
- Fiber: 1g
- Protein: 4g
- Cholesterol: 45mg